 ホーム
>> ヘッドライン
>>
PC修理のわたなべ
| メイン | 簡易ヘッドライン |
 |


|
現在データベースには 506 件のデータが登録されています。

4800円


ビーズのレディースバッグになります。
内側のポットに糸ほぐれがみられます。
全体的に綺麗な状態に保管されていたと思われます。
【平置きサイズ】
縦18cm 横30cm 奥行7cm
※素人測定となります
お問合せ
※商品タイトルを「題名」にコピーして送信してください
[contact-form-7]

1600円

| ブランド | ノーブランド品 |
| 色 | レッド |
| 商品の寸法 | 8.5長さ x 5.3幅 x 0.1高さ cm |
| リモコンは付属していますか? | いいえ |
| メーカー | B-CAS |
お問合せ
※商品タイトルを「題名」にコピーして送信してください
[contact-form-7]

6800円


使用感が少ない美品となります。
E1 Learning (E1 ラーニング) in & out
【特徴】 多くの教材は1レッスンが長くただ聞くだけで終わってしますが In &Out
は1レッスン約3~4分と短く、ターゲットの会話のみで構成されているので 学びやすい!
内容は教科書英語の退屈な英語でなく本当にネイティブが使う自然な英会話のみ。
だから実際に使える英語が学べます!
今までの教材ではカバーされていなかった、実際に日常で使われている友達や同僚との会話がたくさんあるのですぐに使える英語を身に着ける事ができます。
また通常1つのシチュエーションで1レッスンということにこだわらず実際にあり得るたくさんのシチュエーションが採用されているのでどんな場面でも実際に自然な英語が話せるようになります。
【内容】180レッスン 日本語・英語入りCD、英語のみのCDが合計18枚、そして会話の内容を読んで理解することができるガイドブック付
【ここが他とは違う】 ネイティブが作った教材だから本当に通じて自然な英語が身に着く! 英語&日本語のCDの場合、英語→日本語→英語と英語が最後に流れているようになっていることです。通常の教材は、英語→日本語ですが、それではせっかく英語を勉強しているのに頭に残るのは日本語だけということになってしまいます。
【こんな声を頂いています】「短くて自分の空いた時間に利用できて良い」 「教科書英語ではないので楽しく勉強できる」 「自然なネイティブのフレーズが修得できて、周りにびっくりされた」 「海外旅行にも使えた」 「留学準備にもばっちり」
【こんな方におススメ】
〇英語は好きだけど教科書で勉強するのは苦手
〇とにかく通じて自然な英語が学びたい
〇海外旅行に行って少しでもいいから英語を使えるようになりたい
〇留学・ワーキングホリデーの前に英語の準備をしたい
〇通勤や通学中に英語の勉強がしたい
〇ホームステイに行く・受け入れる前に英語の勉強をしておきたい
〇家事の合間や育児をしながら自宅で英語の勉強をしたい
〇英会話学校に通う時間がない
お問合せ
※商品タイトルを「題名」にコピーして送信してください
[contact-form-7]

4800円
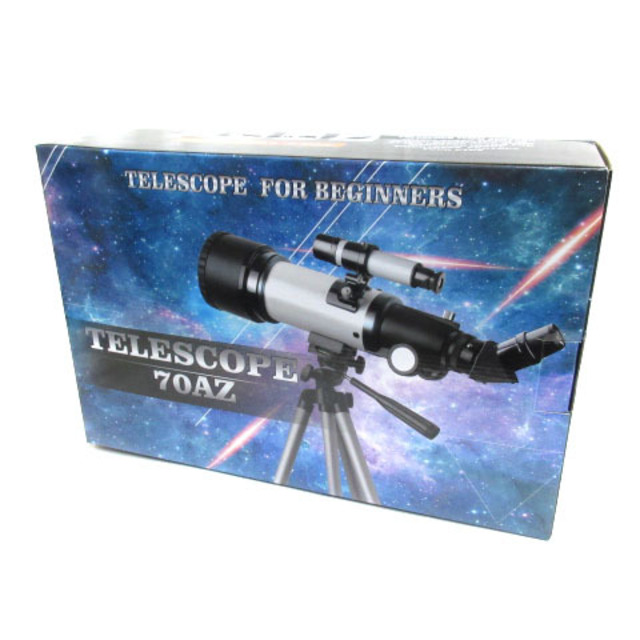
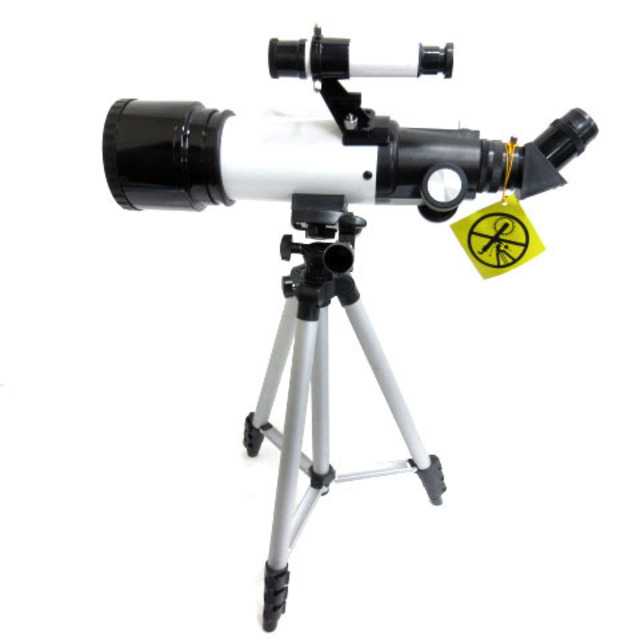
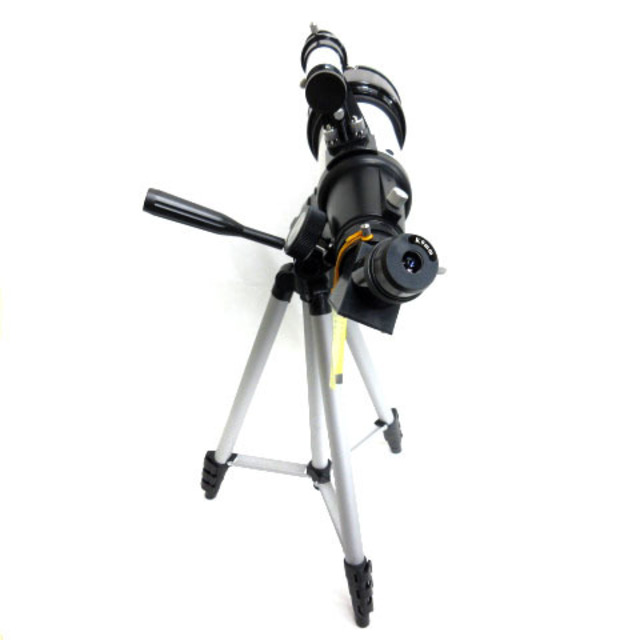
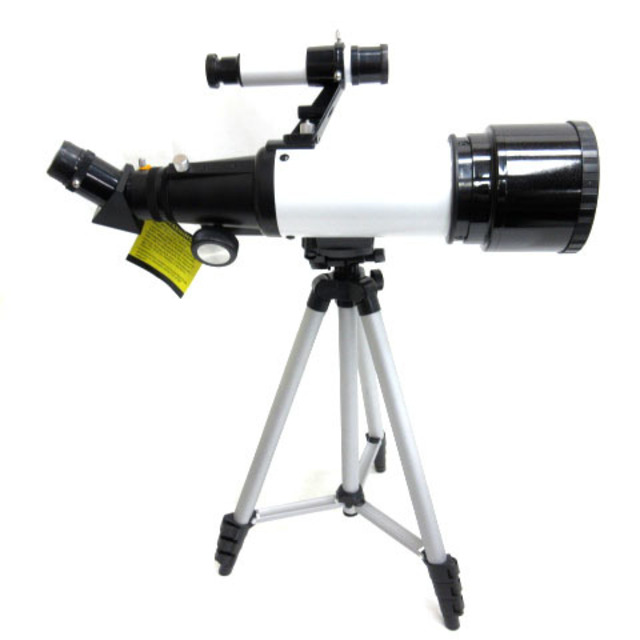
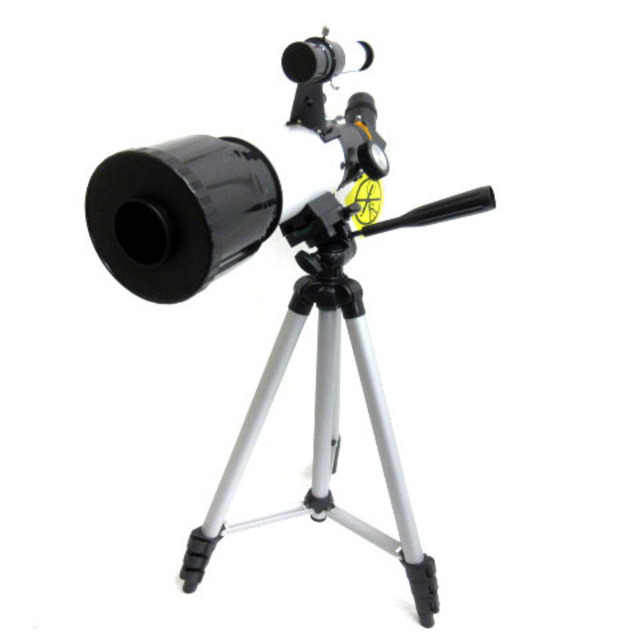
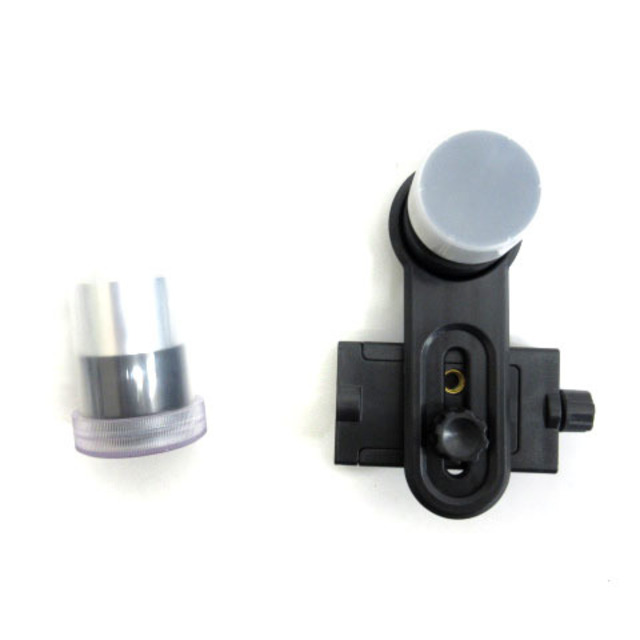
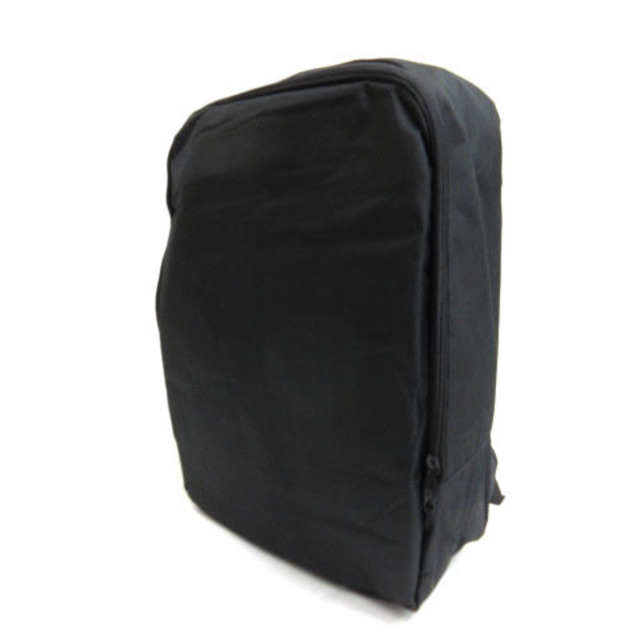

【商品名】SOLOMARK?TELESCOPE?70AZ?天体望遠鏡?セット?70mm?屈折式?伸縮式三脚?天体観測?ホワイト
【実寸サイズ】本体全長(接眼レンズ除く)?約35cm????三脚の高さ?約44-119??
【色】ホワイト?ブラック
【仕様】品番:F40070AZ????・口径?70mm??・焦点距離?400mm??・アイピース1?K9mm???・倍率1?44.5X??・アイピース2?K20mm???・倍率2?20X??・ファインダースコープ?5X24
【状態ランク】A
【状態】使用感が少なく、非常に状態の良い商品です。【使用回数2回】
お問合せ
※商品タイトルを「題名」にコピーして送信してください
[contact-form-7]

【新品】980円


耐熱ガラス製ボウル3個セット
S:幅156×奥行156×高さ102mm
M:幅187×奥行187×高さ115mm
L:幅210×奥行210×高さ120mm
「MADE IN JAPAN」
HARIOの耐熱ガラスのほとんどは日本の自社工場で作られています。
重金属などは一切使わずピュアな素材だけを用いて
HARIOの耐熱ガラスは作られています。
お問合せ
※商品タイトルを「題名」にコピーして送信してください
[contact-form-7]


完売しました。
値下 160,000円
ローカルPCでAI画像を生成したい方へ
AI画像を生成するためには、高スペックなパソコンが必要です。
最小スペックでも15万円以上のパソコンが必要となります。
※特にグラフィックボード(GPU)
私もはじめは最小スペックでAI画像を生成していました。
しかし、生成時間があまりにもかかるので、少しずつですがスペックを上げていきました。
高スペックにすればするほど、生成時間も短縮され、AI画像を生成することが楽しくなりました。
AI画像生成に興味を持たれた方は、まずは以下のサイトをご覧ください。

パソコンスペック
| 筐体 | サーマルテイク(thermaltake) |
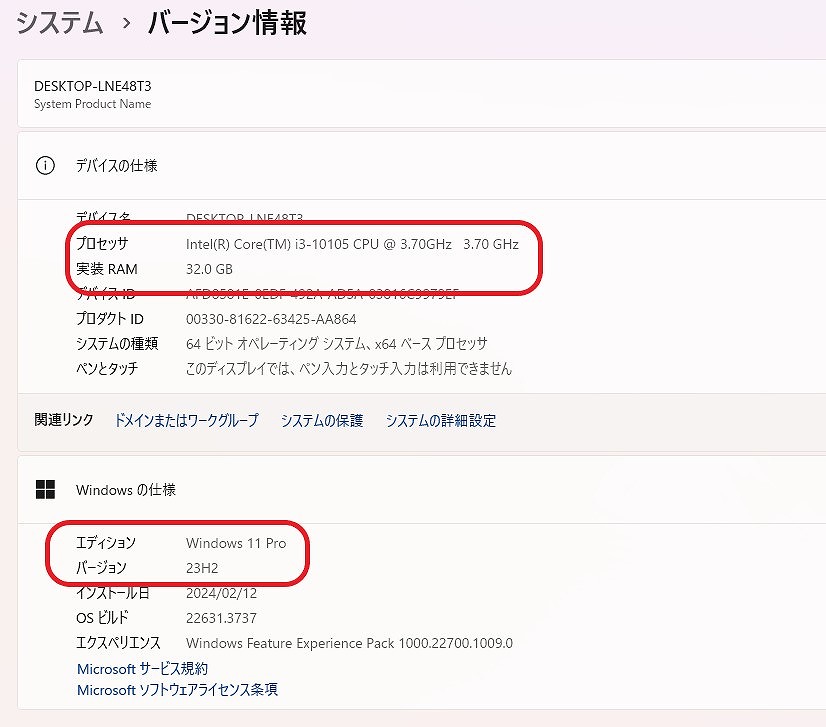
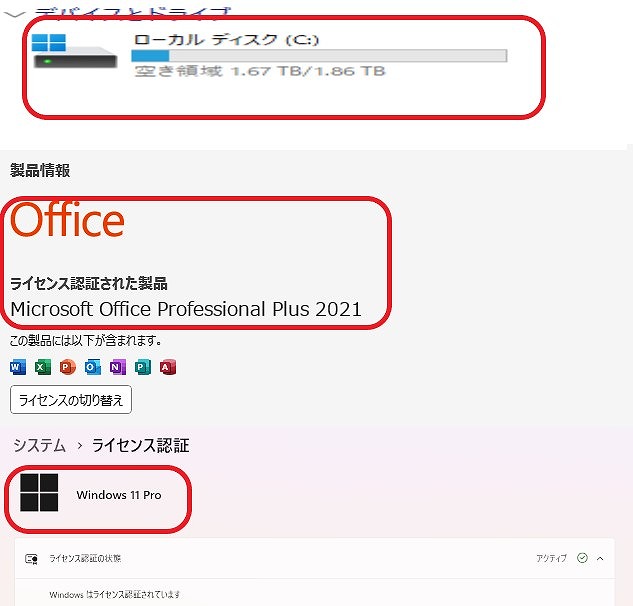
| OS | Windows11 Pro |
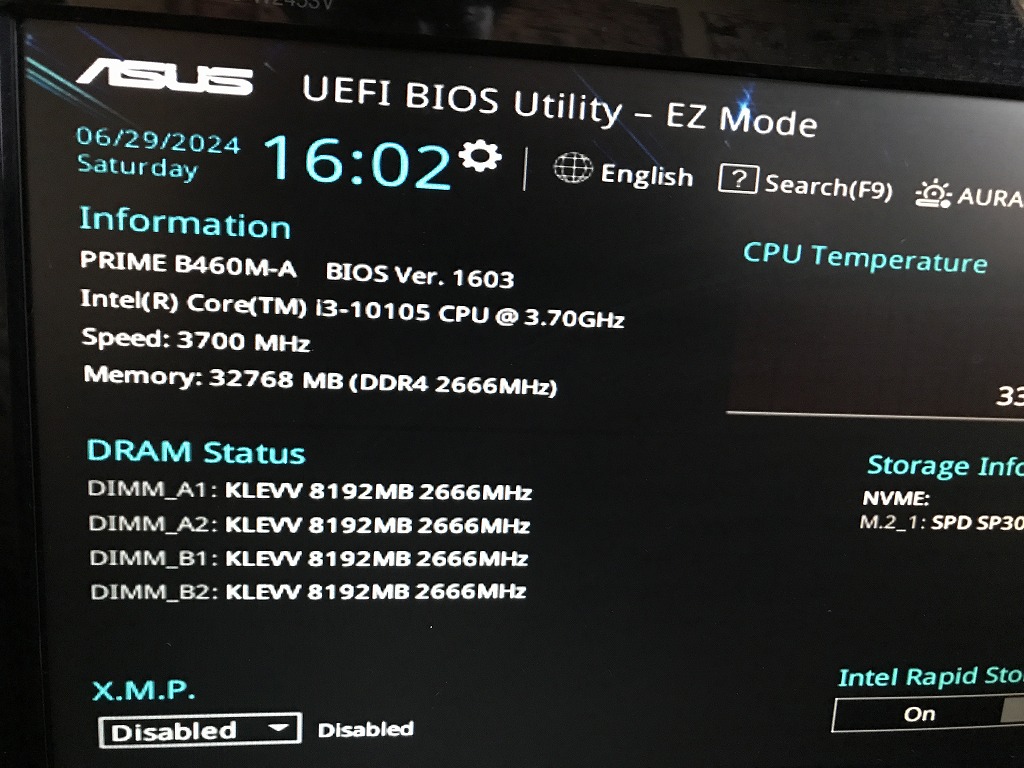
| マザーボード | B460M-A |
| CPU | Intel(R) Core(TM)i3-10105 CPU @ 3.70GHz |
| メモリ | KLEVV 32 GB (スロット:4/4) |
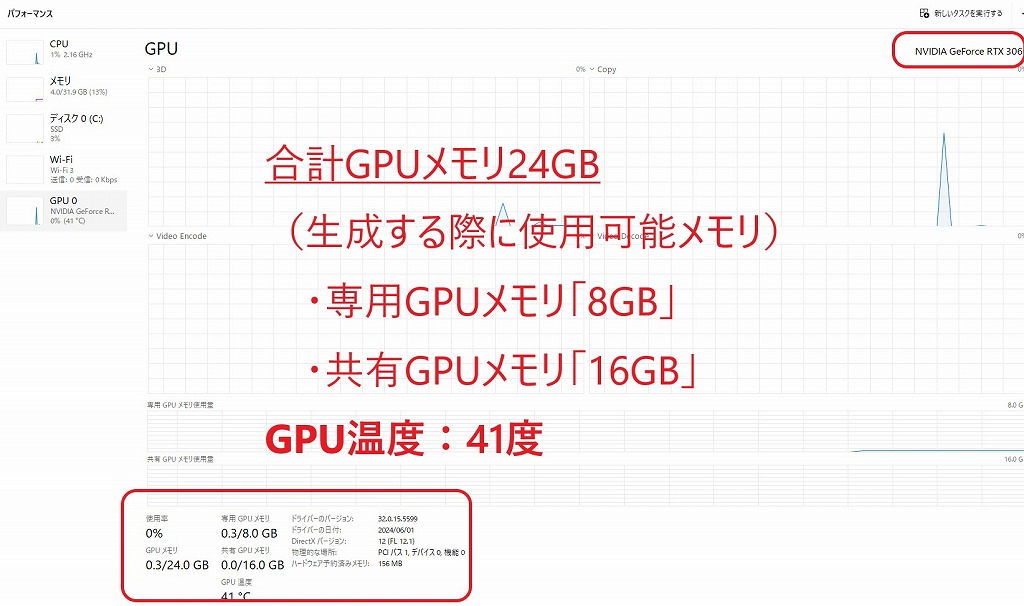
| グラフィック | NVIDIA GeForce RTX 3060 8GB |
| ストレージ | SSD M.2 : 2TB (新品) |
| オフィスソフト | Microsoft Office Pro 2021 |
| 電源ユニット | Corsair CX450M |
| ネットワーク | 有線〇/無線〇(TP-Link WiFi子機 AC1300 867Mbps + 400Mbps ) |
ギャラリー



商品説明
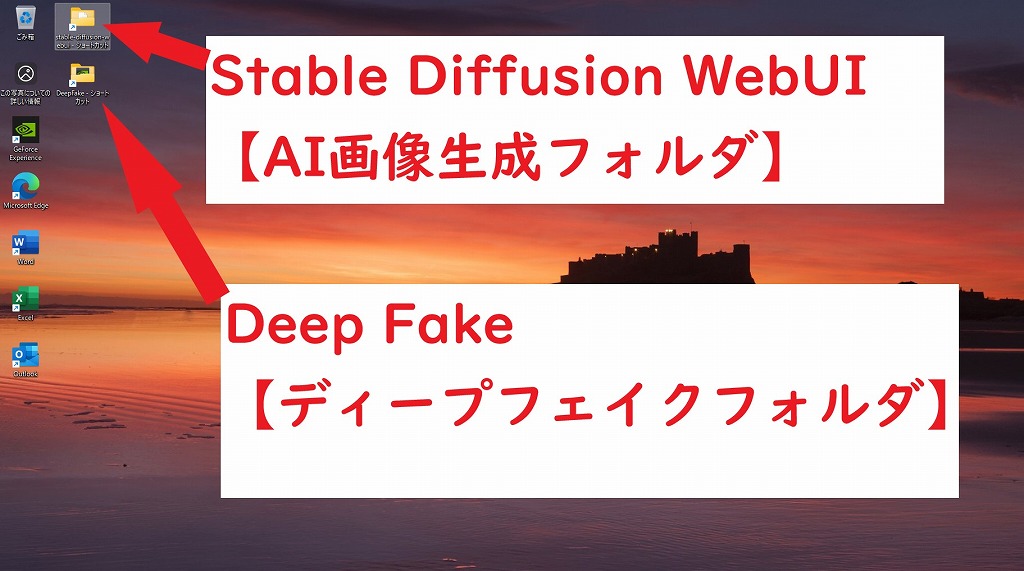
AI画像生成 「 Stable Diffusion WebUI
」を生成するために自作パソコンを構築しました。また、ディープフェイク動画生成する「 Rope
(最新)」「 ReActor-UI 」も構築しました。
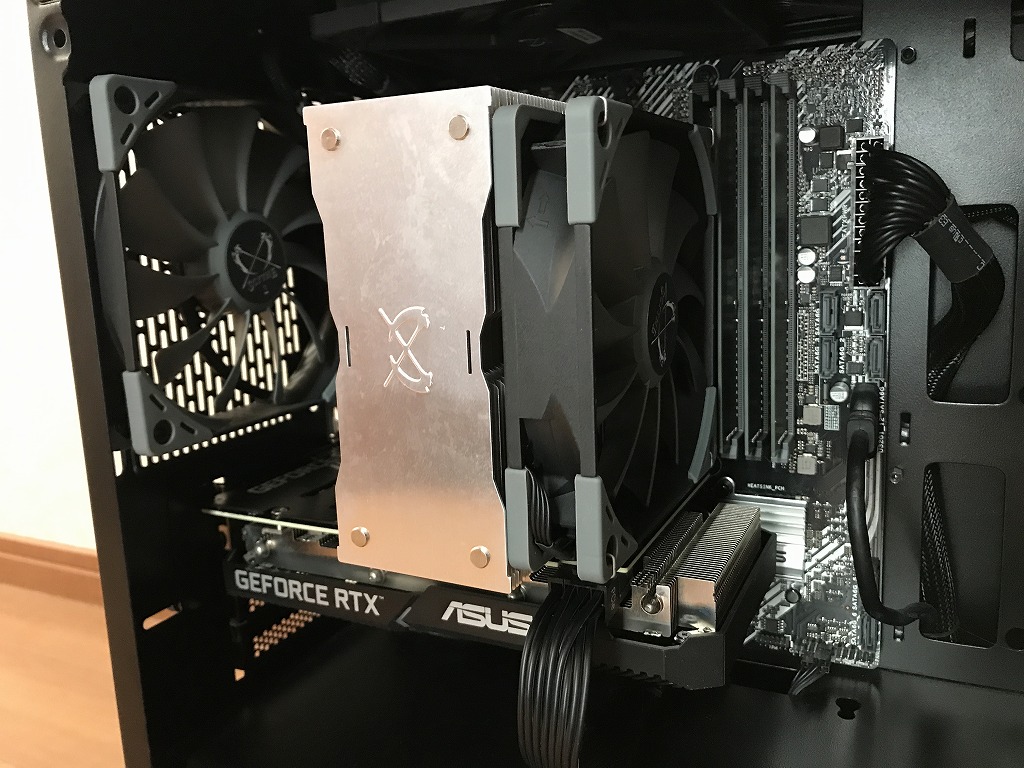
グラフィックボードは「 NVIDIA GeForce RTX 3060 8GB
(ASUS) 」です。
CPUは「 Intel(R) Core(TM) i3-10105 CPU @ 3.70GHz 」となります。※ファン:前後、上面などに複数設置済み(生成速度の低下を抑制します)
合計 GPUメモリ24GB (生成する際に使用可能メモリ):専用GPUメモリ「 8GB
」、共有GPUメモリ「 16GB 」
私見になりますが、パソコンはある程度綺麗に使用されていたように感じます。※詳細は、画像でご確認ください。AI画像生成に興味を持たれている方もいるかと思い、出品するにあたり、
「 Stable Diffusion WebUI 」 と「 Rope 」「 ReActor-UI 」
を再構築しました。
ローカルPCなので、AI画像、スワップ動画などを無制限に生成することが可能です。
AI生成にご興味を持たれた方などは、ご検討いただけると有難いです。
AI画像生成 設定済み
●Stable Diffusion WebUI(AI画像生成)
- Stable Diffusion WebUI インストール済み
- CheckPoint インストール済み
- フォルダ内「 webui-user.bat 」ダブルクリックで起動
すぐに、AI画像を生成できます!
●Rope (ディープフェイク動画生成:複数人個別スワップ可)※新スワップUI
- 元動画データ と 変更したい各顔画像 を準備すれば、新しい動画が生成可能
- フォルダ内「 Rope_setup.bat 」ダブルクリックで起動
●ReActor-UI (ディープフェイク動画生成)
- 元動画データ と 変更したい顔画像 を準備すれば、新しい動画が生成可能
- フォルダ内「 ReActor_setup.bat 」ダブルクリックで起動
●roop (ディープフェイク動画生成)
- 元動画データ と 変更したい顔画像 を準備すれば、新しい動画が生成可能
- フォルダ内「 roop_setup.bat 」ダブルクリックで起動
詳細は、「Stable Diffusion」「Rope」「ReActor-UI」で検索をお願いいたします。
AI生成/スワップ方法なども、検索などでご確認いただけるようにお願いいたします。
すぐに、AI画像を生成できます!
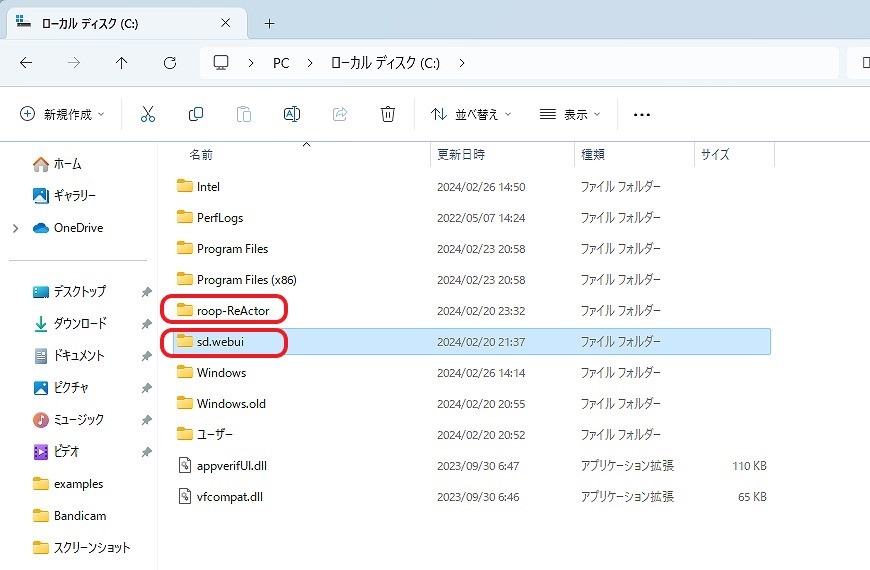
「 Stable Diffusion WebUI 」と「 ReActor-UI 」の生成方法
「 Rope 」の生成方法
料金
税込 220,000円 (税抜200,000円)→ 税込 160,000円 (※在庫処分)
お問合せ
※商品タイトルを「題名」にコピーして送信してください
[contact-form-7]


49500円 →? 40000 円(※在庫処分)
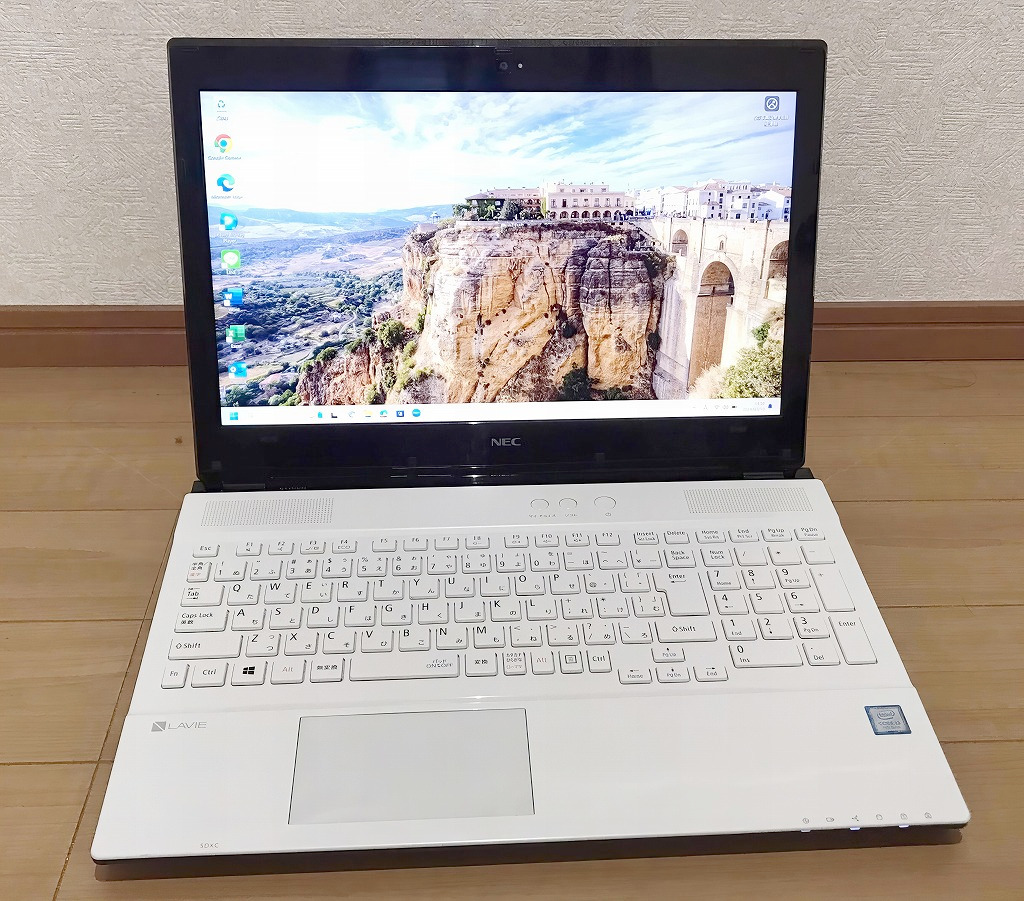
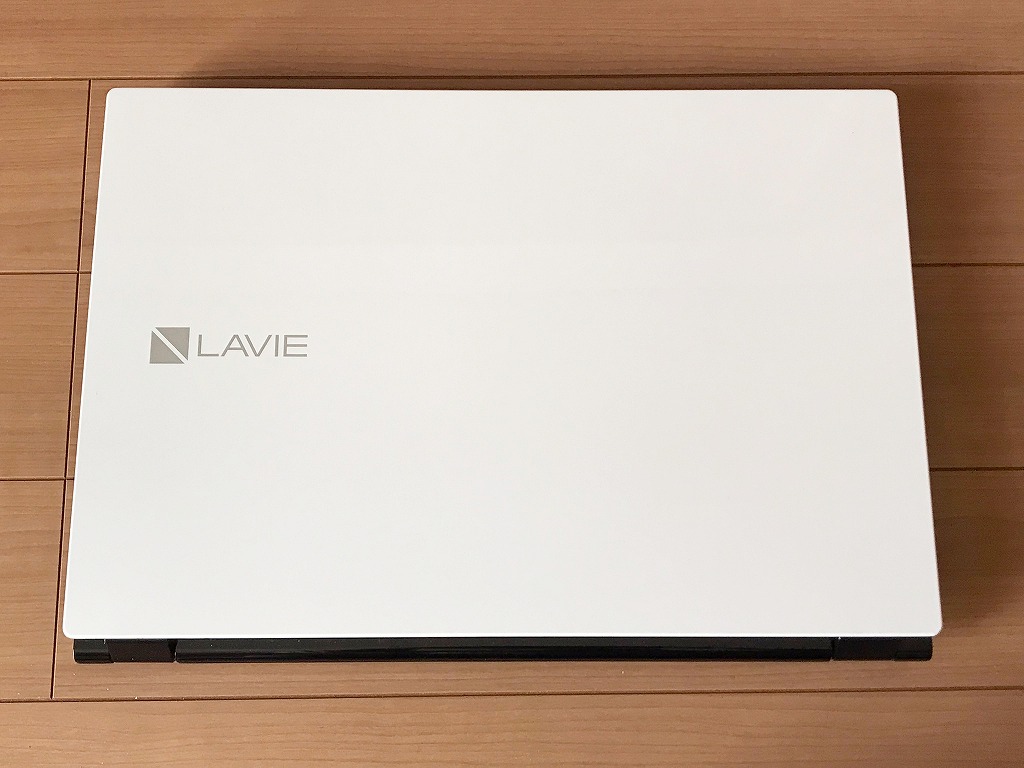
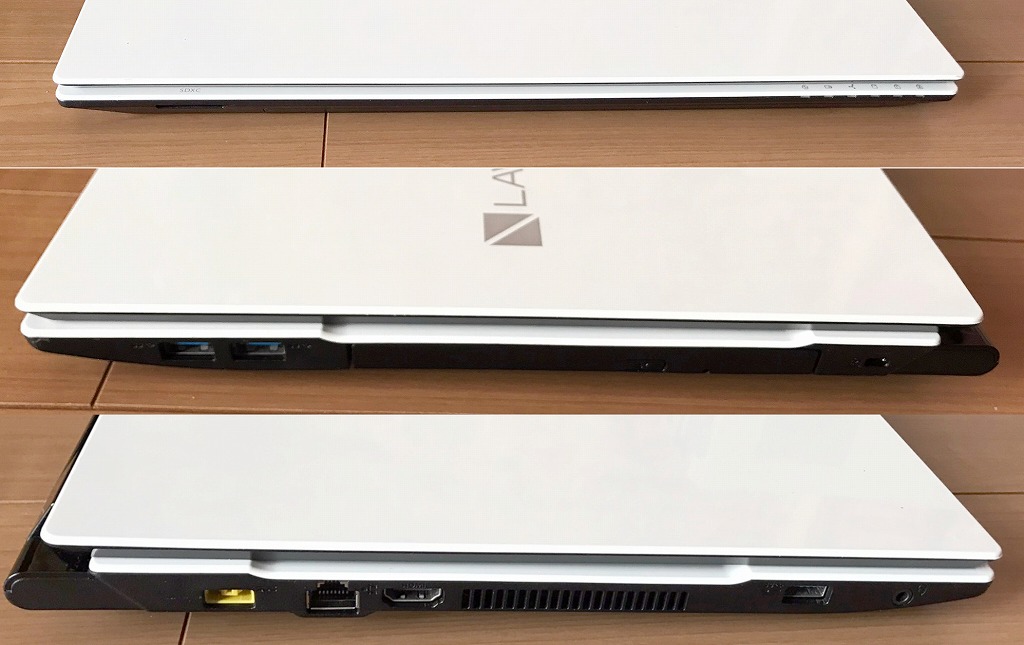
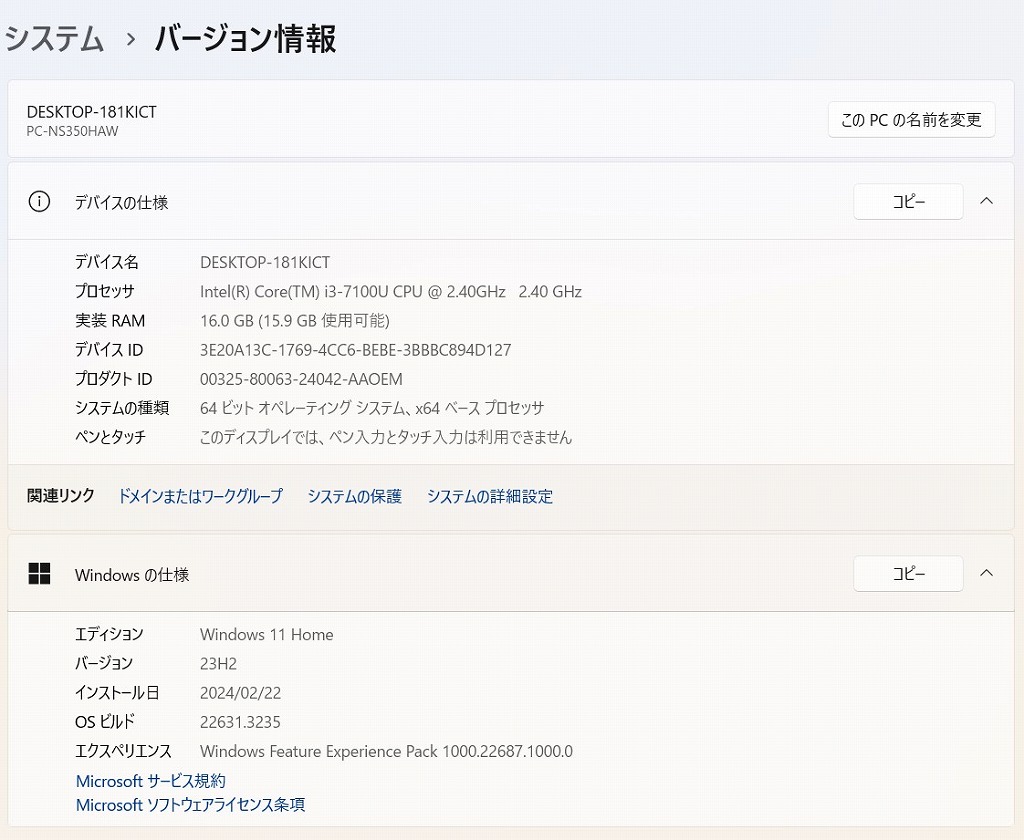
新品メモリ16GB搭載/超美品/第7世代i3/新品SSD1TB/Webカメラ/Blu-ray/Office/Win11/
ギャラリー


説明
Intel Core i3プロセッサー&新品メモリ16GB搭載で、動作も快適♪
ハードディスクも新品1TB(1000GB)SSDへ換装済み!
無線LAN内蔵なので、家の中でもケーブル不要・場所を選ばずネットが出来ます!
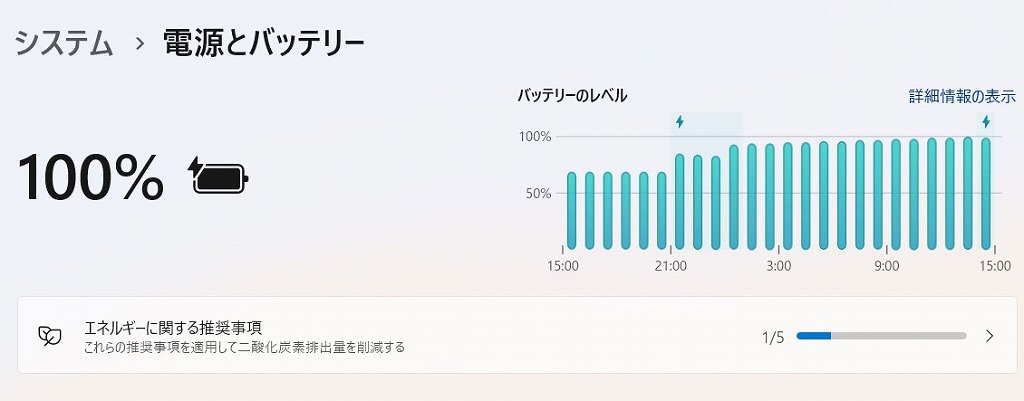
ほぼ新品に近く、超美品に思います。
| 状態 | 中古品【美品】 |
|---|---|
| パソコンメーカー | NEC |
| 型番 | PC-NS350HAW |
| カラー | クリスタルホワイト |
| CPU | Intel CORE i3-7100U 2.40GHz |
| メモリ | 16 GB |
| ストレージ | SSD 1TB(1000 GB) |
| 表示能力 | 15.6 インチ |
| OS | Windows 11 Home 64 bit |
| ソフト | Microsoft Office 365 |
| 光学ドライブ | Blu-ray Disc 光学ドライブ搭載 |
| ネットワーク | 有線:○ / 無線:○ |
| 接続端子 | USB 3.0x 3 個 |
| 内蔵機能 | WEBカメラ / Bluetooth / スピーカー / テンキー |
| 付属品 | 電源アダプタ / ACケーブル |
料金
税込? 49500円 ?(税抜45000円)→税込? 40000 円(※在庫処分)
お問合せ
※商品タイトルを「題名」にコピーして送信してください
[contact-form-7]


46200円 →? 38000 円(※在庫処分)
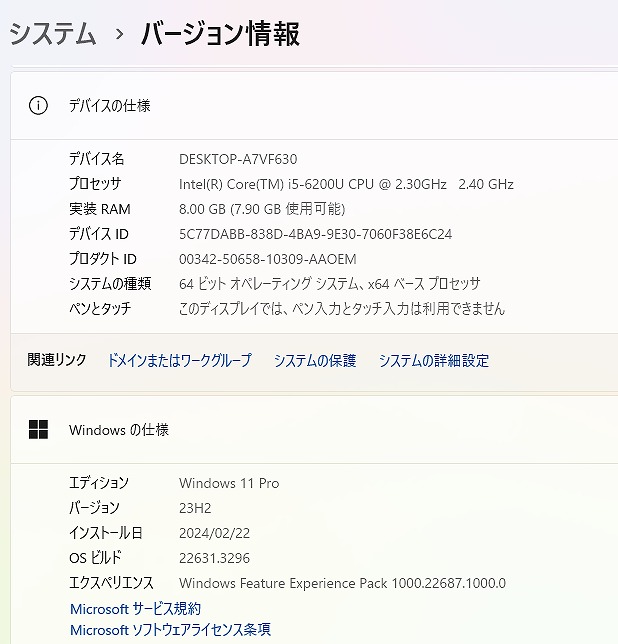
高性能第6世代i5搭載/超美品/新品M.2 SATA512GB+HDD512GB/メモリ8GB/Webカメラ/Office/Win11/
ギャラリー



説明
Intel Core i5 プロセッサー& メモリ8GB 搭載で、動作も快適♪
ハードディスクも追加で、新品M.2 SSD 512GB へ換装済み!

- M.2 SSD Type 2280 512GB【新品】 追加
※一般的なSSDより高速
- 高性能なCPUの Core i5 (第6世代)、大容量の新品 M.2 SSD 512TB (読み書きが速い!)と,大容量 メモリ8GB で、動画編集もいけます。
- 最新の Microsoft office 2021 Professional Plus インストール済み!
無線LAN内蔵なので、家の中でもケーブル不要・場所を選ばずネットが出来ます!
新品に近く使用感も少なく、美品に思います。
| 状態 | 中古品【美品】 |
|---|---|
| パソコンメーカー | HP |
| 型番 | ProBook 450 G3 |
| カラー | ブラック |
| CPU | Intel CORE i5-6200U 2.30-2.80GHz |
| メモリ | 8 GB |
| ストレージ | M.2 SSD 512GB 【新品】+HDD 512 GB 【計1TB(1000GB)】 |
| 表示能力 | 15.6 インチ |
| 解像度 | 1366×768 |
| OS | Windows 11 Pro 64 bit |
| ソフト | Microsoft Office Professional plus 2021 |
| 光学ドライブ | DVDスーパーマルチ |
| ネットワーク | 有線:○ / 無線:○ |
| 接続端子 | USB: 3.0x2個 2.0x2個 |
| 内蔵機能 | WEBカメラ / Bluetooth / スピーカー / テンキー |
| 付属品 | 電源アダプタ / ACケーブル |
料金
税込? 46200円 ?(税抜42000円)→? 38000 円(※在庫処分)
お問合せ
※商品タイトルを「題名」にコピーして送信してください
[contact-form-7]


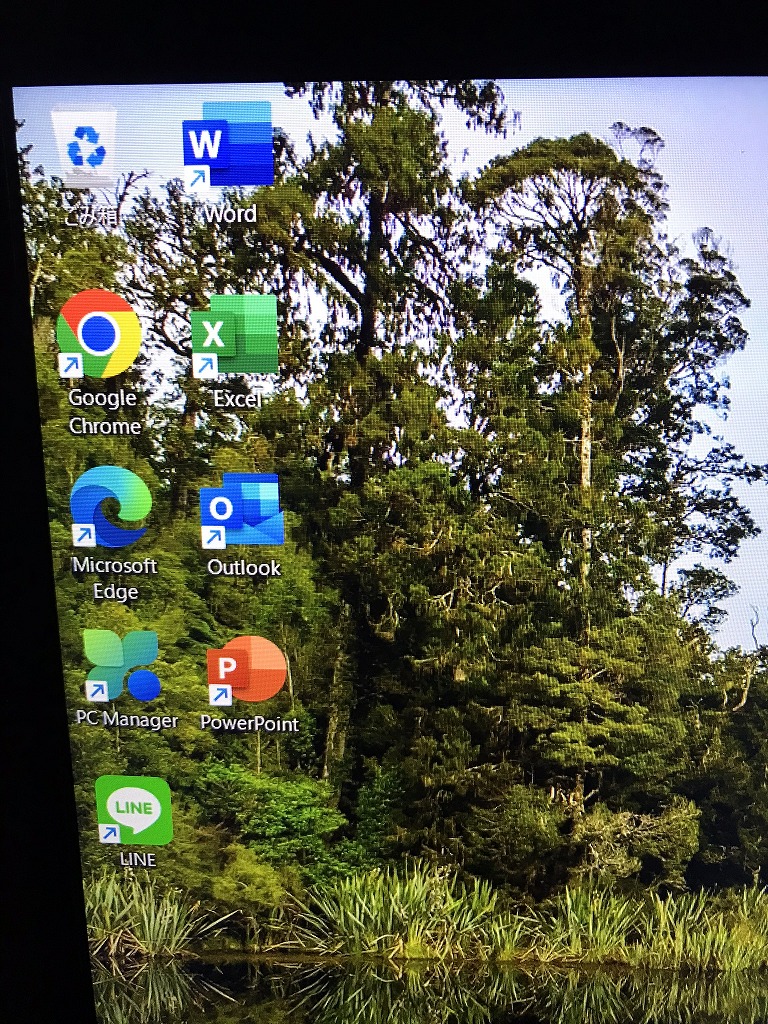
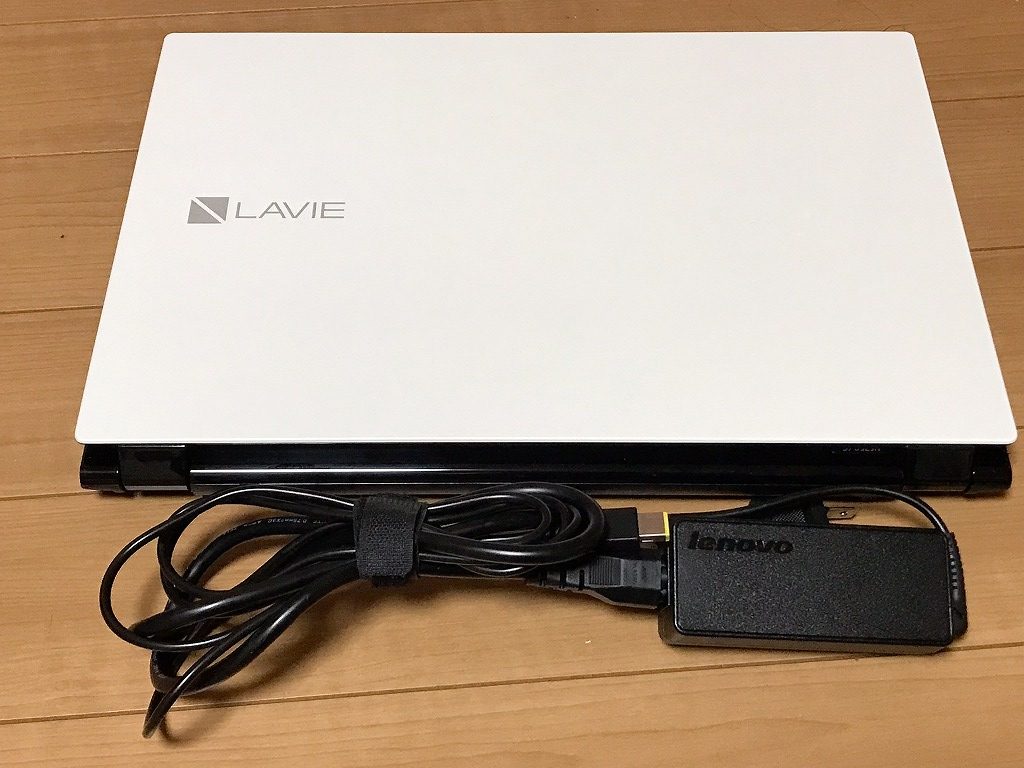
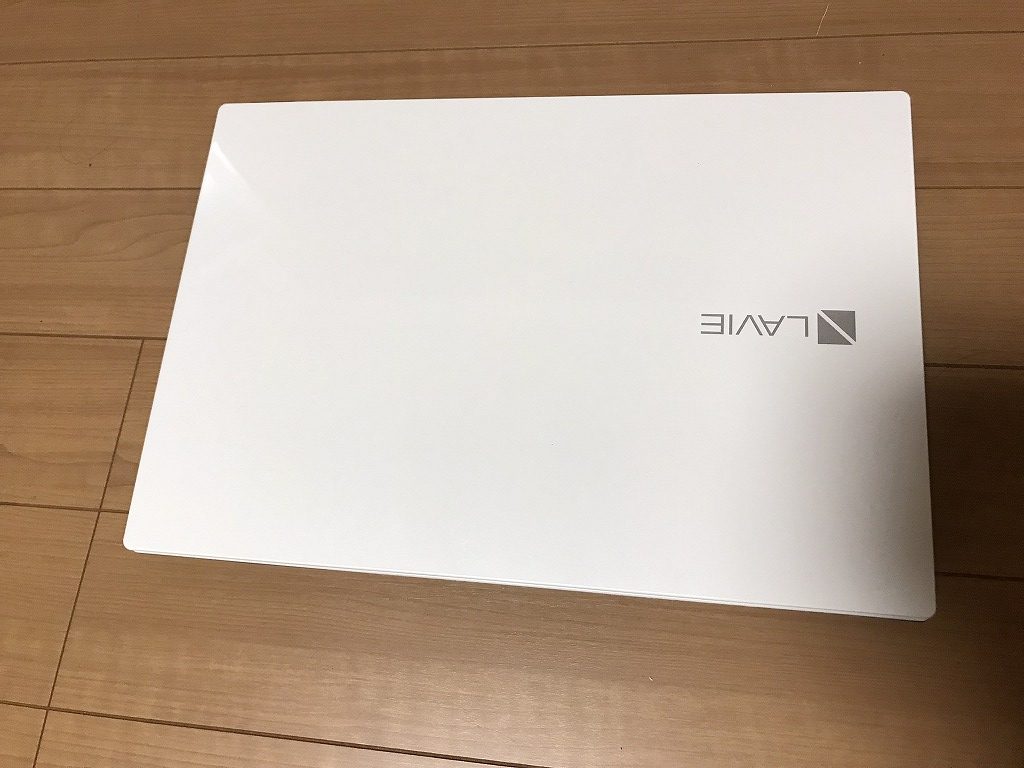
79200円 → 60000円 ?(※在庫処分)
ギャラリー
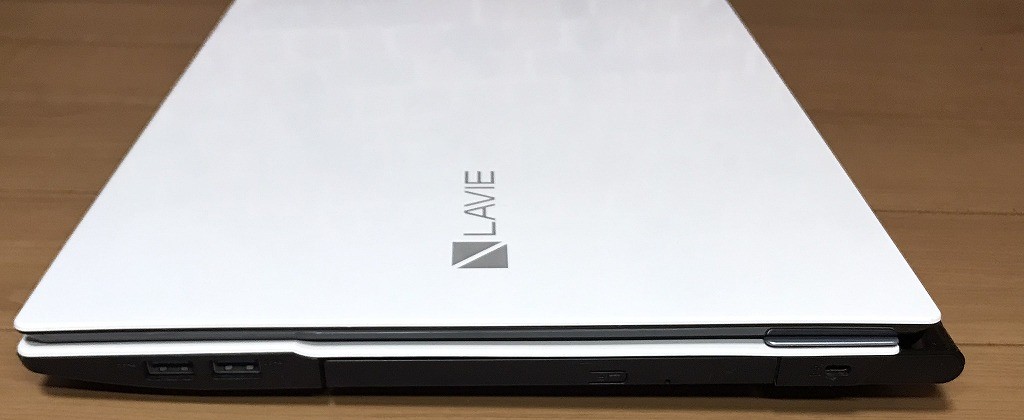
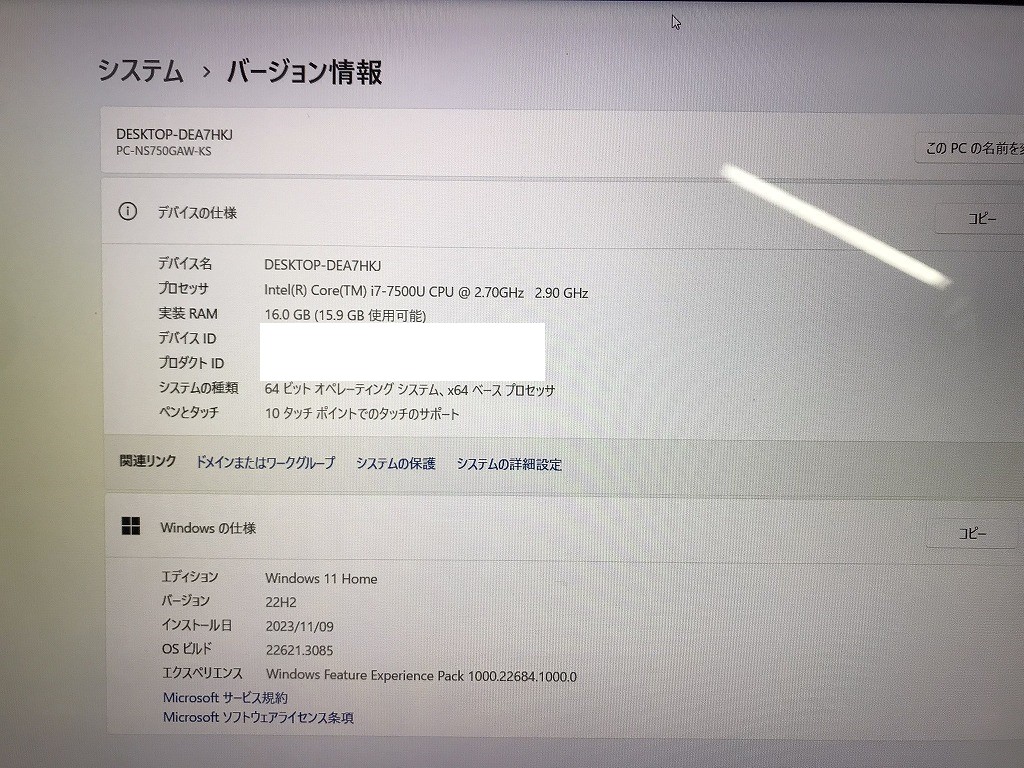

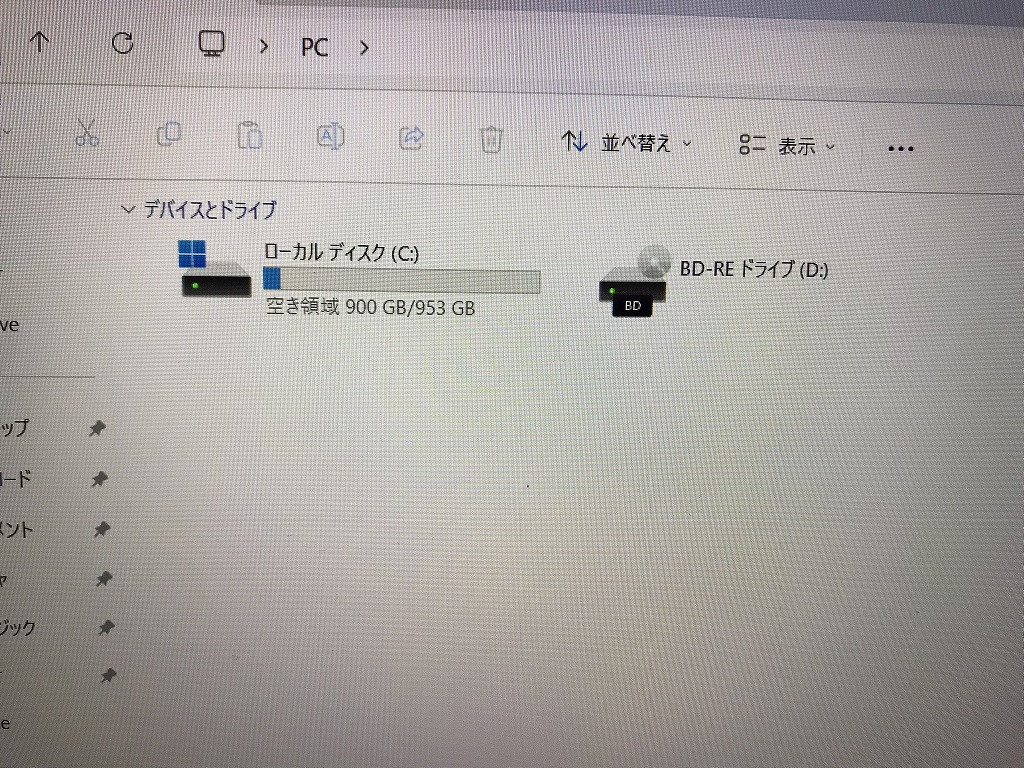
説明
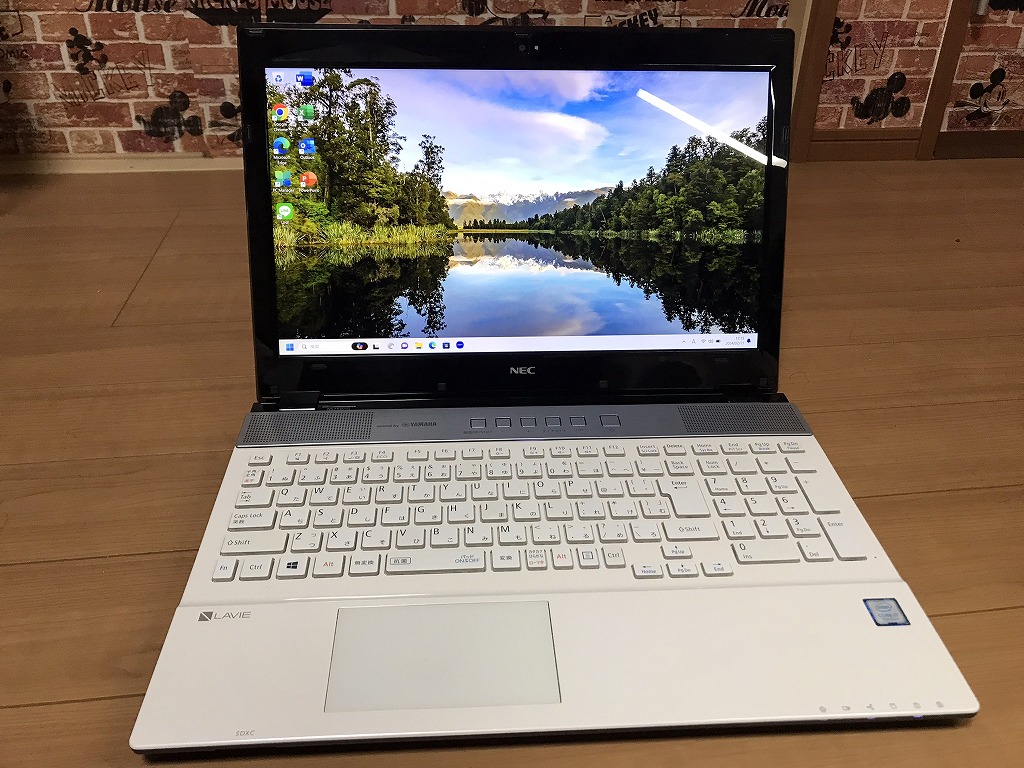
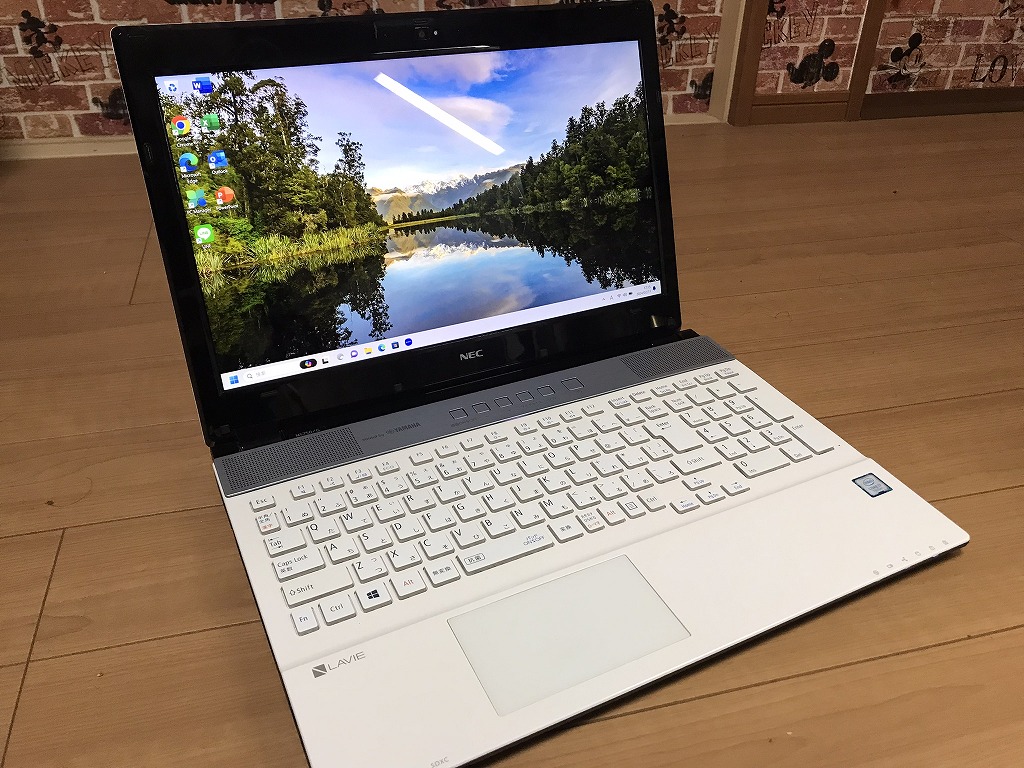
Intel Core i7プロセッサー&メインメモリ16GB(増設済み)搭載で、動作も快適♪
デスクトップPCに勝るとも劣らぬウルトラハイスペックマシン!
ハードディスクも超特盛1TB(1000GB)SSDへ換装済み!
高速化技術を搭載した最新のハードディスクなので、ビデオ編集用マシンにも最適です!
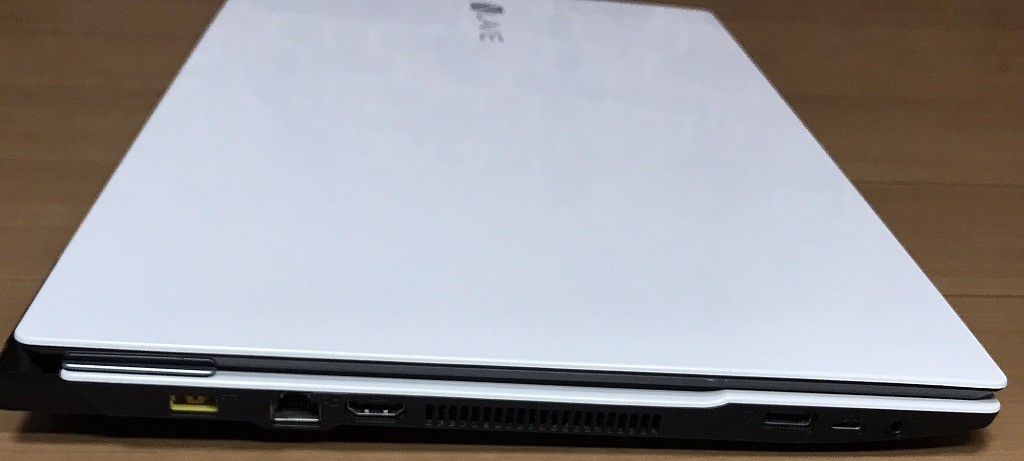
読み書き両対応のブルーレイドライブ内蔵!15.6型のスーパーシャインビューLED液晶に加え、
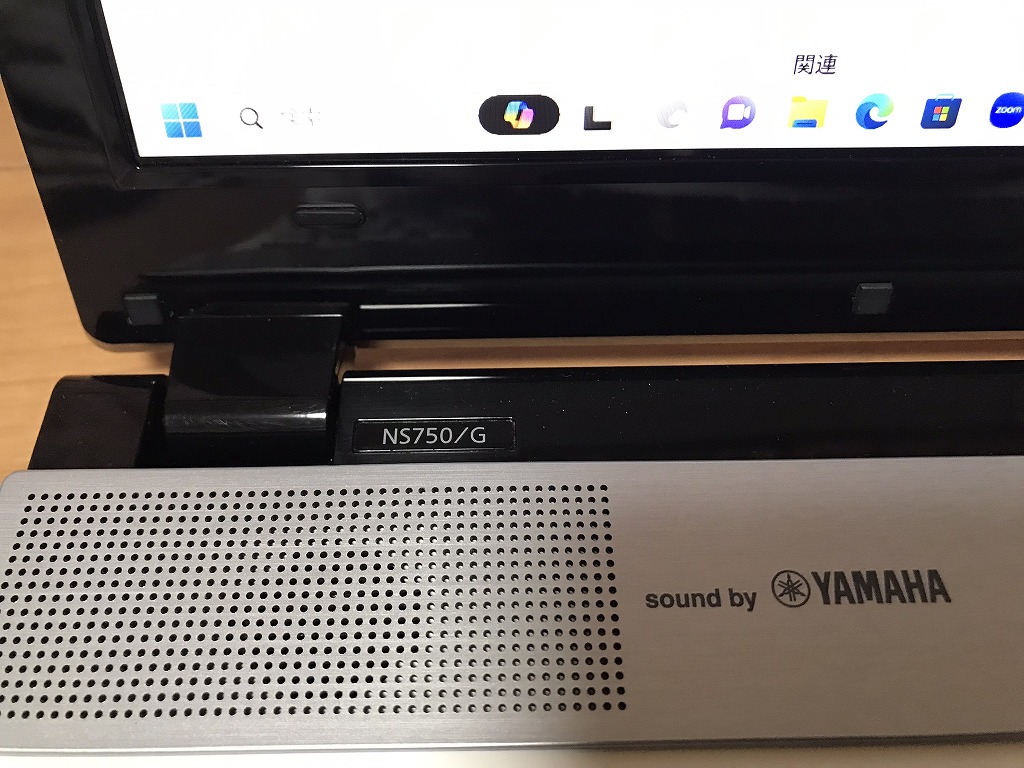
NECハイエンドノートではお馴染みヤマハ製の高音質2.1ch内蔵スピーカーも搭載!
さらに4K出力対応のHDMI端子も搭載!! 映画視聴にうってつけのモデルです!
無線LAN内蔵なので、家の中でもケーブル不要・場所を選ばずネットが出来ます!
| 状態 | 中古品【美品】 |
|---|---|
| パソコンメーカー | NEC |
| CPU | Intel Core i7 7500U 2.7 GHz |
| メモリ | 16 GB |
| ストレージ | SSD 1TB(1000 GB) |
| 表示能力 | 15.6 インチ 光沢液晶 |
| OS | Windows 11 Home 64 bit |
| ソフト | Microsoft Office Professional Plus 2021 |
| 光学ドライブ | Blu-ray 読込/書込 対応 |
| ネットワーク | 有線:○ / 無線:○ |
| 接続端子 | USB 3.0 / HDMI端子 / マイク入力 / ヘッドホン出力 / microSDカードスロット / LANポート(100/1000 BASE) / USB Type-C |
| 内蔵機能 | WEBカメラ / Bluetooth / スピーカー / テンキー |
| 付属品 | 電源アダプタ / ACケーブル (他社Lenovo) |
| 外形寸法 | 約 382 (幅) × 270 (奥行) × 25.7 (高さ)mm(突起部含まず) |
| 質量 | 約 2.5 kg (標準バッテリパック装着時) |
料金
税込? 79200円 ?(税抜72000円)→ 税込? 60000円 ?(※在庫処分)
お問合せ
※商品タイトルを「題名」にコピーして送信してください
[contact-form-7]


完売しました。
66000円
NEC GN256Y/37 M.2 SSD 500GB【新品】/バッテリー【新品】 Win11/Core i7-6500U/8GB/WEBカメラ/無線/Office
参考資料
ある学校に配布されたパソコン販売パンフレット

ギャラリー



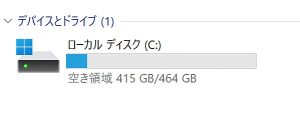
説明
Intel Core i7プロセッサー&メモリ8GB搭載で、動作も快適♪
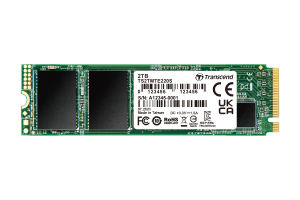
- M.2 SSD 500GB【新品】
※一般的なSSDより高速 - バッテリー 電池パック交換【新品】
- 超軽量で丈夫なモデルです。その上、性能も申し分ありません。
- 高性能なCPUの Core i7 、大容量の新品 M.2 SSD 500GB (読み書きが速い!)と,大容量 メモリ8GB で、動画編集もいけます。
- 最新の Microsoft office 2021 Professional Plus インストール済み!
- 新品バッテリー交換
無線LAN内蔵なので、家の中でもケーブル不要・場所を選ばずネットが出来ます!
外観に細かい汚れ、傷あります。
| 状態 | 中古品 |
|---|---|
| パソコンメーカー | NEC |
| 型番 | PC-GN256Y3A7 |
| カラー | ブラック |
| CPU | intel Core i7-6500U (2.5GHz) |
| メモリ | 8 GB |
| ストレージ | M.2 SSD 500GB【新品】 |
| 表示能力 | 13.3型 |
| 解像度 | 2560 ×1440ドット |
| OS | Windows11 Home 64bit |
| ソフト | Microsoft Office Professional plus 2021 |
| 光学ドライブ | 無 |
| ネットワーク | 有線:× / 無線:○ |
| 接続端子 | USB:3.0 2個 |
| 内蔵機能 | WEBカメラ / Bluetooth / スピーカー / テンキー |
| インターフェース | HDMI、SDXC |
| 付属品 | 電源アダプタ / ACケーブル |
| 外形寸法 | 316 x 19.9 x 227 mm, 1.269 kg |
料金
税込 66000円 (税抜60000円)
お問合せ
※商品タイトルを「題名」にコピーして送信してください
[contact-form-7]


