ホーム
>> ヘッドライン
>>
PC修理のわたなべ
ホーム
>> ヘッドライン
>>
PC修理のわたなべ
| メイン | 簡易ヘッドライン |
 |


|
現在データベースには 509 件のデータが登録されています。

参考サイト
【UE5】Unreal EngineでMMD動画作るよ!【MMD】【I’ll make MMD videos with Unreal Engine!】【春日部つむぎのゲーム作ってみよう!】
詳細HP

【ゲームエンジン】: Unreal Engine 5.1.1
https://www.unrealengine.com/ja/
【Voice】: VOICEVOX:春日部つむぎ
https://tsukushinyoki10.wixsite.com/k…
【立ち絵】:
春日部つむぎ立ち絵_公式_v2.0
https://kasukabe294.booth.pm/items/34…
【背景】:
フリー素材あそび
https://free-stock.design-asobi.net/
【Music】: necobeam (ねこビーム)
https://www.youtube.com/@necobeam/fea…
【効果音】: 効果音ラボ
https://soundeffect-lab.info/
【アウトロ】: Canva
https://www.canva.com/
【マウスエフェクト】: Target
https://www.gigafree.net/tool/office/…
【使用したソフト】:
Blender3.6 アドオン『MMDTools』
https://mmd-blender.fandom.com/ja/wik…
Unreal Engine5.1 PMXEditor
https://kkhk22.seesaa.net/category/14…
【MMDモデル】:
風真いろは
【公式】
https://3d.nicovideo.jp/works/td84835
【MMDモーション】:
おどる春日部つくしMMD
https://www.nicovideo.jp/watch/sm4074…
カメラワーク

Camera Rig Rail から撮影する

カメラ撮影
AI画像作成
StableDiffusionにて生成

3Dモデル生成
Blenderにて生成
FaceBuilder for BlenderでAI実写画像から頭部のモデルを作成

3Dモデル完成

動画
3Dメッシュ加工
Unreal Engineにて生成
Mesh to MetaHuman

アニメーション制作
オンラインの MetaHuman エディター : MetaHuman | リアルな人間キャラクター クリエイター – Unreal Engine

動画
MetaHumanに変換するとかなりイメージが変わってしまった
リール動画
AI画像【SD】→3Dモデル【Blender】 – YouTube
参照サイト
Omniverse Audio2Faceでリップシンクアニメーションを作ってみた

Audio2Faceでリップシンクアニメーション作成
Omniverse Audio2Face: https://www.nvidia.com/en-us/ai-data-science/audio2face/

音声作成
音声読み上げソフト: https://ondoku3.com/ja/

動画制作
canva: https://www.canva.com/

完成動画
AIモデルのアニメーションCM動画
参考サイト
【Unreal Engine】プレイヤーを『MetaHuman』に切り替える!【UE5】
人型モデルを生成
MetaHuman Creator で高品質な人型モデルを作成

Unreal Engine 5
Unreal Engine 5 へインポート

完成
キャラクターをMetaHumanに変更できた
はじめに
以下のサイトをみつけた
Unreal Engine 5 Semi-Real Virtual Human Demo
MetaHuman Creator
MetaHuman Creator で高品質な人型モデルを作成できる: https://metahuman.unrealengine.com/

参考サイト
UE5 | MetaHuman Creatorで高品質な人型モデルを生成しポートレートを作ろう!
人型モデルを生成
MetaHuman Creator で高品質な人型モデルを作成

Unreal Engine 5
Unreal Engine 5 へインポート

完成動画

 ポッドキャスト :
video/mp4
ポッドキャスト :
video/mp4
roop-ReActor本家
インストール元: https://github.com/Gourieff/ReActor-UI
インストール方法: https://github.com/s0md3v/roop/wiki/1.-Installation
事前準備
事前セットアップ(Windows):https://github.com/s0md3v/roop/wiki/1.3-Setup-Windows
Python
winget install -e --id Python.Python.3.10
PIP
python -m ensurepip
GIT
winget install -e --id Git.Git
FFmpeg
winget install -e --id Gyan.FFmpeg
Reboot your system in order for FFmpeg to function properly.
shutdown /r
Toolset
Microsoft Visual C++ 2015 Redistributable
winget install -e --id Microsoft.VCRedist.2015+.x64
Microsoft Visual Studio 2022 build tools
During installation, ensure to select the Desktop Development with C++ package.
  winget install -e --id Microsoft.VisualStudio.2022.BuildTools --override "--wait --add
Microsoft.VisualStudio.Workload.NativeDesktop --includeRecommended"
roop-ReActor構築
Cドライブに新規「 DeepFake 」フォルダを作成
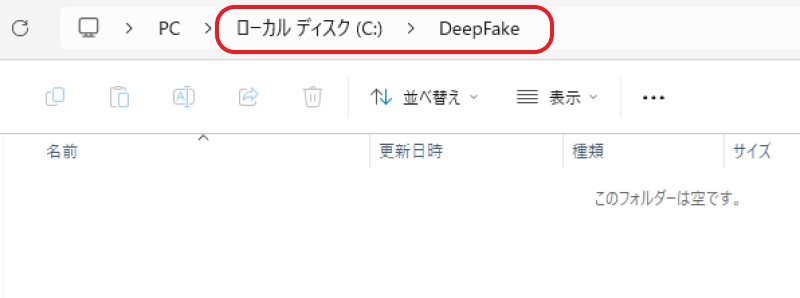
コマンドプロンプトで、 C:\DeepFake に移動(※管理者で起動)
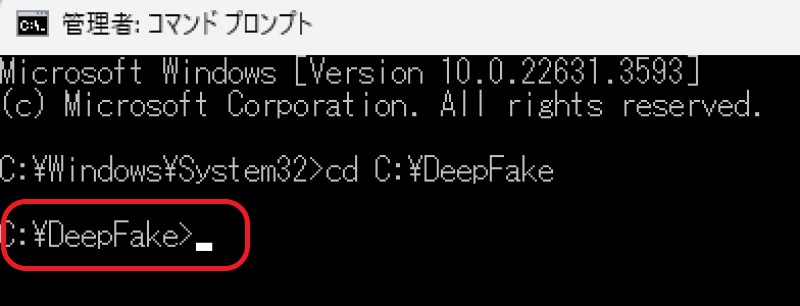
コマンドを実行
git clone https://github.com/Gourieff/ReActor-UI.git

C:\DeepFake に「ReActor-UI」フォルダが生成されています。

コマンドプロンプトで、 C:\DeepFake\ReActor-UI に移動
コマンドを実行
pip install -r requirements.txt

C:\DeepFake\ ReActor-UI フォルダ内にデータが生成されています。

アクセラレーション(加速装置)
CUDA (Nvidia): https://github.com/s0md3v/roop/wiki/2.-Acceleration
- Install CUDA Toolkit 11.8 and cuDNN for Cuda 11.x
- Install dependencies:
  pip uninstall onnxruntime onnxruntime-gpu
pip install onnxruntime-gpu==1.15.1
- Usage in case the provider is available:
python run.py --execution-provider cuda --frame-processor face_enhancer
run.py にて、 roop- ReActor が起動します

オプション:run.py
  python run.py [options]

options:
  -h, --help            show this help message and exit
  -s SOURCE_PATH, --source SOURCE_PATH
                        select an source image
  -t TARGET_PATH, --target TARGET_PATH
                        select an target image or video
  -o OUTPUT_PATH, --output OUTPUT_PATH
                        select output file or directory
  --frame-processor {face_swapper,face_enhancer} [{face_swapper,face_enhancer} ...]
                        pipeline of frame processors
  --keep-fps            keep original fps
  --keep-audio          keep original audio
  --keep-frames         keep temporary frames
  --many-faces          process every face
  --video-encoder {libx264,libx265,libvpx-vp9}
                        adjust output video encoder
  --video-quality VIDEO_QUALITY
                        adjust output video quality
  --max-memory MAX_MEMORY
                        maximum amount of RAM in GB
  --execution-provider {cpu,...} [{cpu,...} ...]
                        execution provider
  --execution-threads EXECUTION_THREADS
                        number of execution threads
  -v, --version         show program's version number and exit
roop – ReActor 実行
Select face: 対象となる画像

Select target: 対象とする動画
「 Start 」ボタンで生成を開始します。
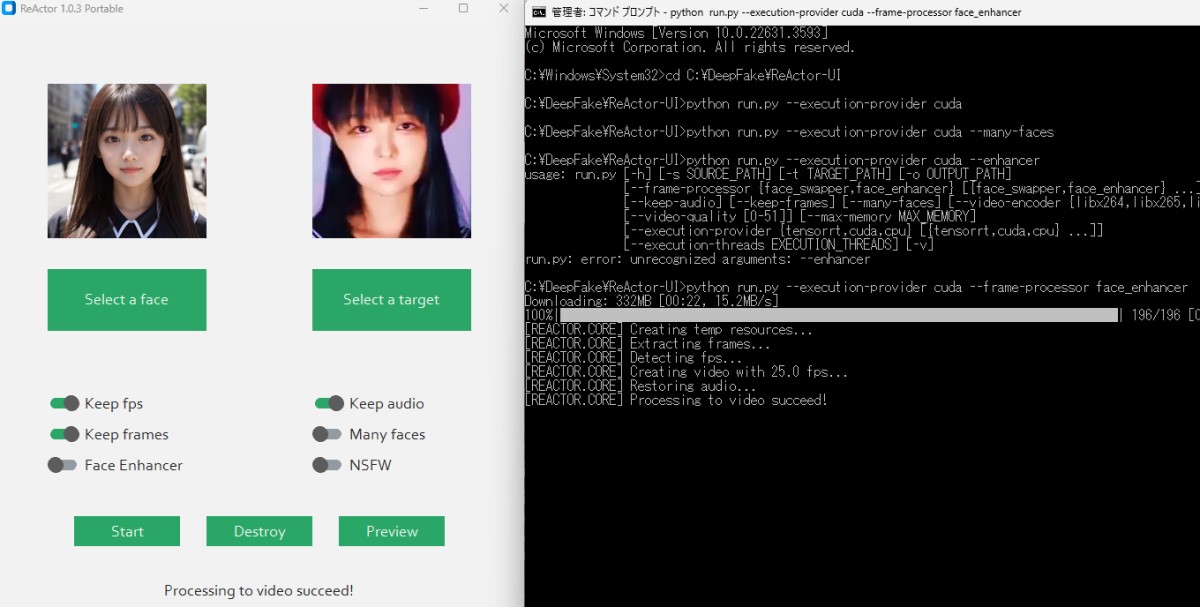
実行結果
起動バッチファイル
roop_setup.bat を新規作成
  python run.py --execution-provider cuda --max-memory 12 --keep-fps --keep-frames --many-faces
pause
C:\DeepFake\ReActor-UIフォルダ内 に roop_setup.bat を保存

roop_setup.bat をダブルクリックすることにより、roop- ReActor が起動できます!
ポッドキャスト :
video/mp4
roop本家
インストール元: https://github.com/s0md3v/roop
インストール方法: https://github.com/s0md3v/roop/wiki/1.-Installation
事前準備
事前セットアップ(Windows):https://github.com/s0md3v/roop/wiki/1.3-Setup-Windows
Python
winget install -e --id Python.Python.3.10
PIP
python -m ensurepip
GIT
winget install -e --id Git.Git
FFmpeg
winget install -e --id Gyan.FFmpeg
Reboot your system in order for FFmpeg to function properly.
shutdown /r
Toolset
Microsoft Visual C++ 2015 Redistributable
winget install -e --id Microsoft.VCRedist.2015+.x64
Microsoft Visual Studio 2022 build tools
During installation, ensure to select the Desktop Development with C++ package.
  winget install -e --id Microsoft.VisualStudio.2022.BuildTools --override "--wait --add
Microsoft.VisualStudio.Workload.NativeDesktop --includeRecommended"
roop構築
Cドライブに新規「 DeepFake 」フォルダを作成
コマンドプロンプトで、 C:\DeepFake に移動(※管理者で起動)
コマンドを実行
git clone https://github.com/s0md3v/roop

C:\DeepFake に「roop」フォルダが生成されています。

コマンドプロンプトで、 C:\DeepFake\roop に移動
コマンドを実行
pip install -r requirements.txt

C:\DeepFake\roopフォルダ内にデータが生成されています。

アクセラレーション(加速装置)
CUDA (Nvidia): https://github.com/s0md3v/roop/wiki/2.-Acceleration
- Install CUDA Toolkit 11.8 and cuDNN for Cuda 11.x
- Install dependencies:
  pip uninstall onnxruntime onnxruntime-gpu
pip install onnxruntime-gpu==1.15.1
- Usage in case the provider is available:
python run.py --execution-provider cuda
run.py にて、 roop が起動します

オプション:run.py
  python run.py [options]

-h, --help
  show this help message and exit
-s SOURCE_PATH, --source SOURCE_PATH
  select an source image
-t TARGET_PATH, --target TARGET_PATH
  select an target image or video
-o OUTPUT_PATH, --output OUTPUT_PATH
  select output file or directory
--frame-processor FRAME_PROCESSOR [FRAME_PROCESSOR ...]
  frame processors (choices: face_swapper, face_enhancer, ...)
--keep-fps
  keep target fps
--keep-frames
  keep temporary frames
--skip-audio
  skip target audio
--many-faces
  process every face
--reference-face-position REFERENCE_FACE_POSITION
  position of the reference face
--reference-frame-number REFERENCE_FRAME_NUMBER
  number of the reference frame
--similar-face-distance SIMILAR_FACE_DISTANCE
  face distance used for recognition
--temp-frame-format {jpg,png}
  image format used for frame extraction
--temp-frame-quality [0-100]
  image quality used for frame extraction
--output-video-encoder {libx264,libx265,libvpx-vp9,h264_nvenc,hevc_nvenc}
  encoder used for the output video
--output-video-quality [0-100]
  quality used for the output video
--max-memory MAX_MEMORY
  maximum amount of RAM in GB
--execution-provider {cpu} [{cpu} ...]
  available execution provider (choices: cpu, ...)
--execution-threads EXECUTION_THREADS
  number of execution threads
-v, --version
  show program's version number and exit
roop実行
Select face: 対象となる画像
Select target: 対象とする動画
「 Start 」ボタンで生成を開始します。

実行結果
起動バッチファイル
roop_setup.bat を新規作成
  python run.py --execution-provider cuda --max-memory 12 --keep-fps --keep-frames --many-faces
pause
C:\DeepFake\roopフォルダ内 に roop_setup.bat を保存

roop_setup.bat をダブルクリックすることにより、roopが起動できます!
おまけ:すごく大切なこと
以下のように途中で止まってしまう場合

C:\DeepFake\roop\roop 内フォルダの、 core.py を編集

core.py を編集
編集内容
sys.exit() ⇒ #sys.exit()

これで、途中で止まってしまう現象がスキップできました!
はじめに
コイン収集ゲームに挑戦!
参考サイト
【UE5初心者向け】コイン集めゲームを作りながらUE5の使い方解説?
ゲーム制作過程
マップ

プログラム(ブループリント)

完成
はじめに
3Dモデルを作って動画制作
参考サイト
【Tripo × Mixamo × UE5】3Dモデルを作って動かしてみよう!
制作過程
Tripo: https://www.tripo3d.ai/


Mixamo: https://www.mixamo.com/#/

Unreal Engine: https://www.unrealengine.com/en-US

完成動画
ハイスペック女性戦士、都会降臨!
※腕が体にめり込んでいる…